1. WDI
The World Development Indicators (WDI) package by Vincent Arel-Bundock provides access to a database of hundreds of economic development indicators from the World Bank.
Examples of variables include population, GDP, education, health, and poverty, school attendance rates.
Reference: Arel-Bundock, V. (2017). WDI: World Development Indicators (R Package Version 2.7.1).
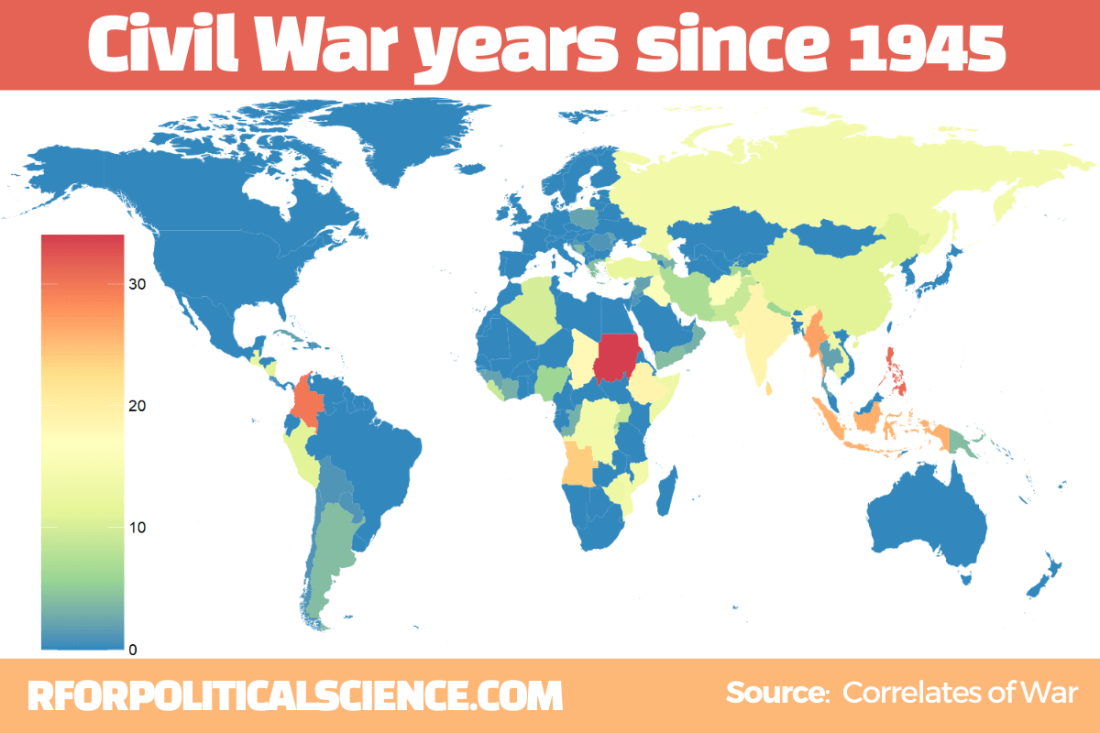
2. peacesciencer
This package by Steve Miller helps you download data related to peace and conflict studies, including the Correlates of War project.
Examples of variables include Alliance Treaty Obligations and Provisions (ATOP), Thompson and Dreyer’s (2012) strategic rivalry data, fractionalization/polarization estimates from the Composition of Religious and Ethnic Groups (CREG) Project, and Uppsala Conflict Data Program (UCDP) data on civil and inter-state conflicts.
Data can come in either country-year, event-level or dyadic-level.
Reference: Steve Miller (2020). peacesciencer: Tools for Peace Scientists (R Package Version 0.2.2). Website retrieved at http://svmiller.com/peacesciencer/ms.html
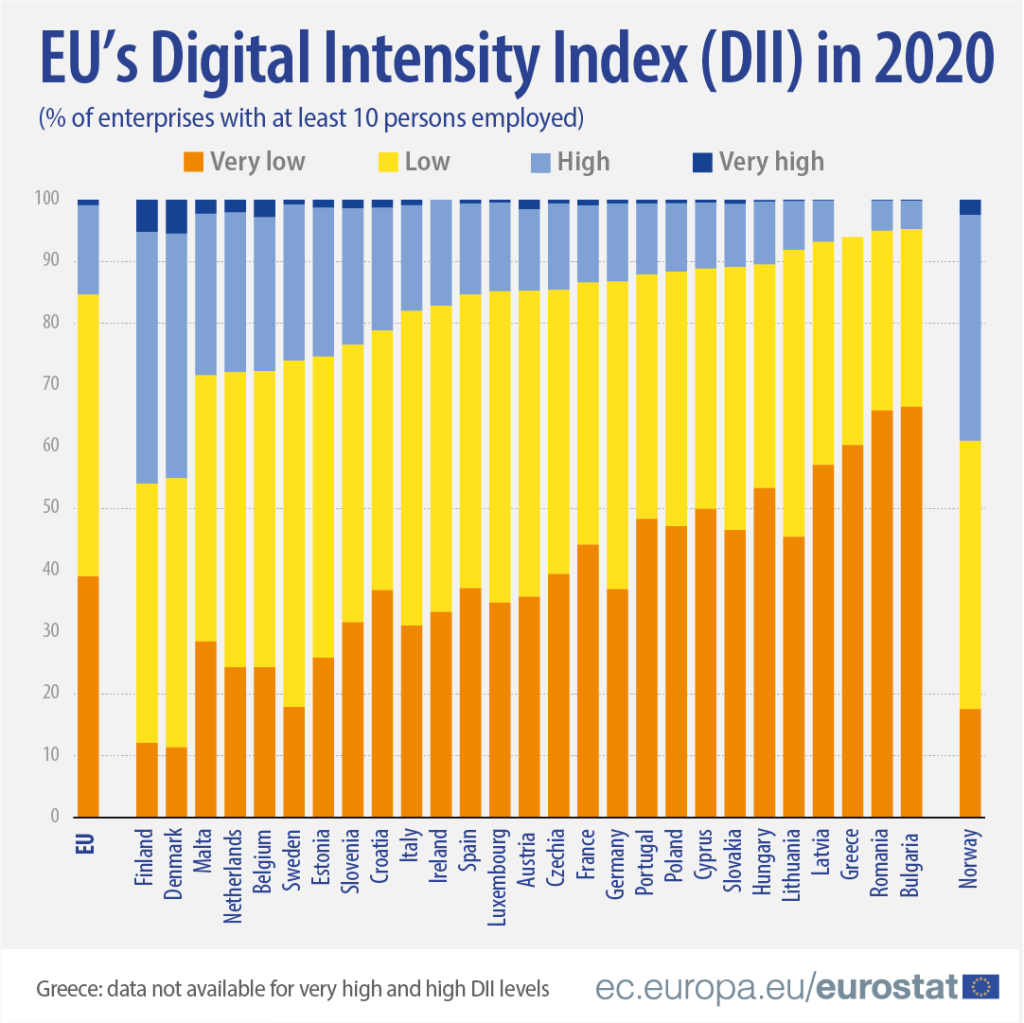
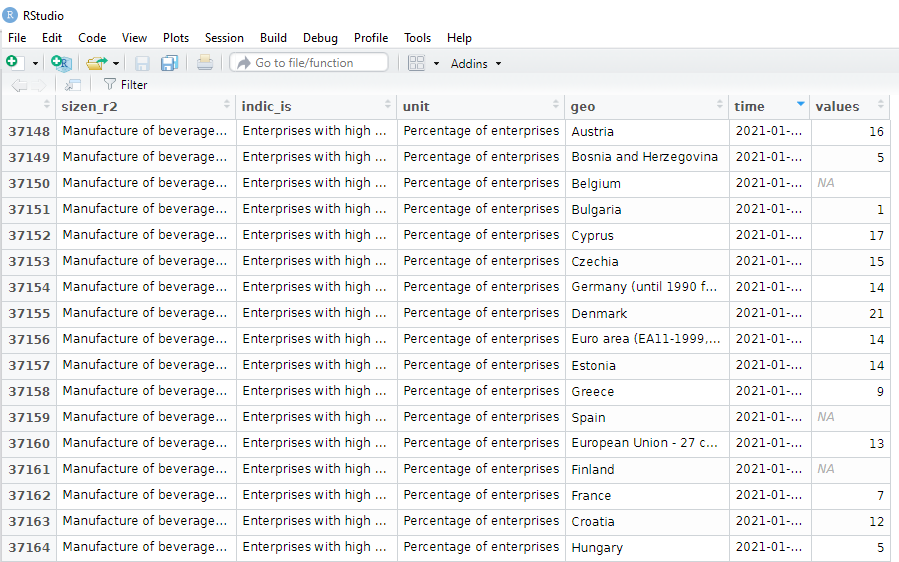
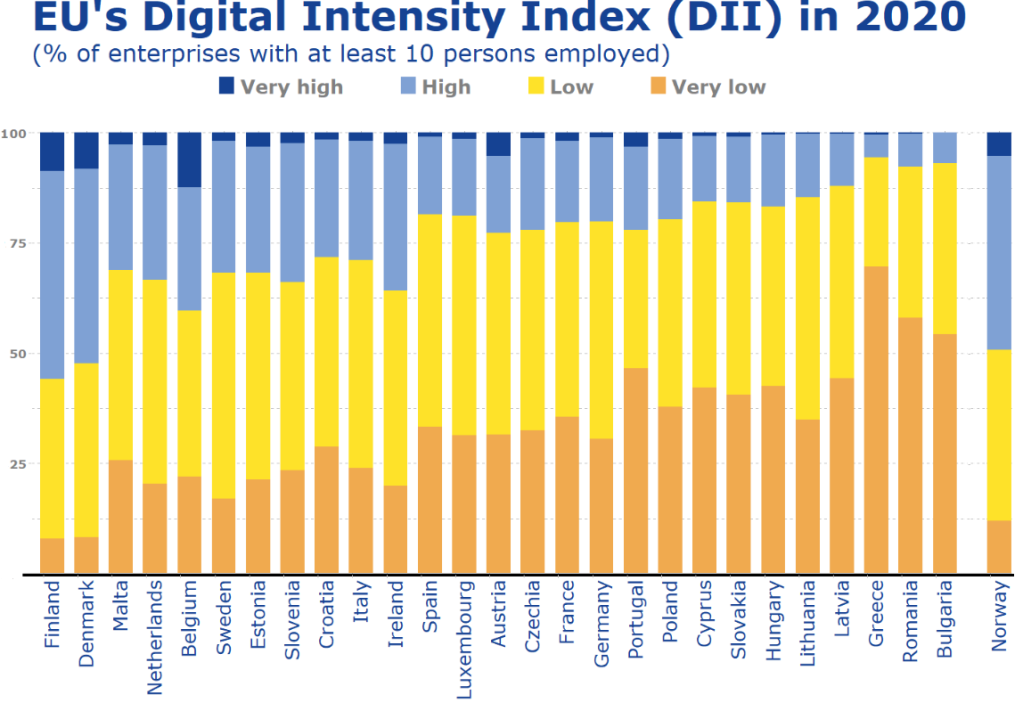
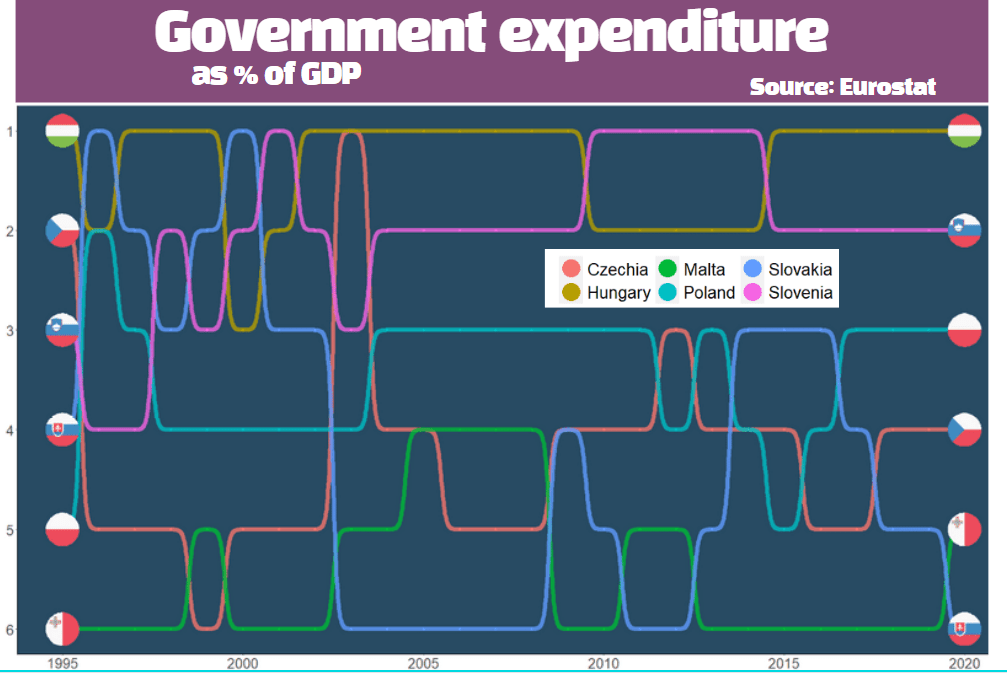
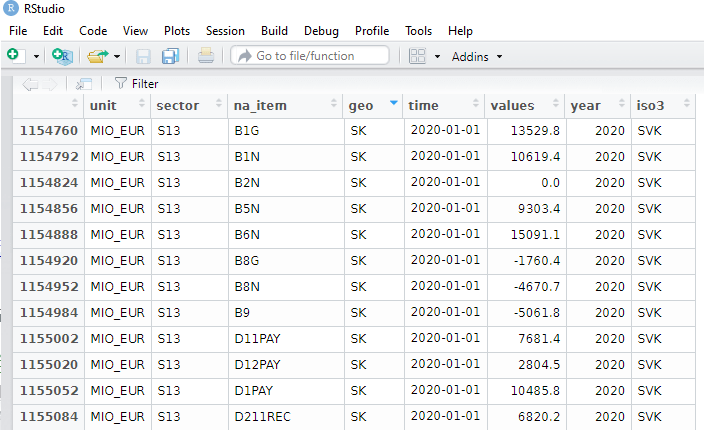
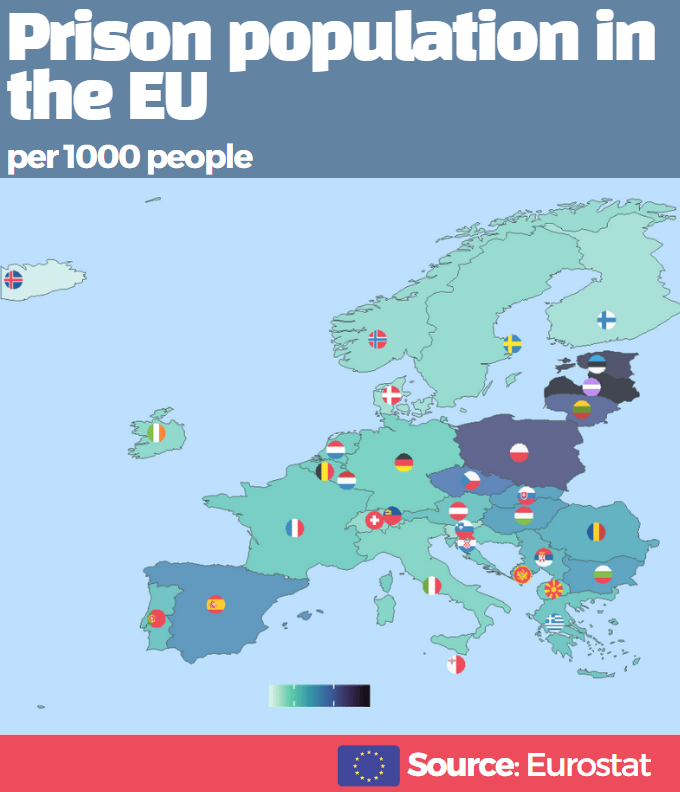
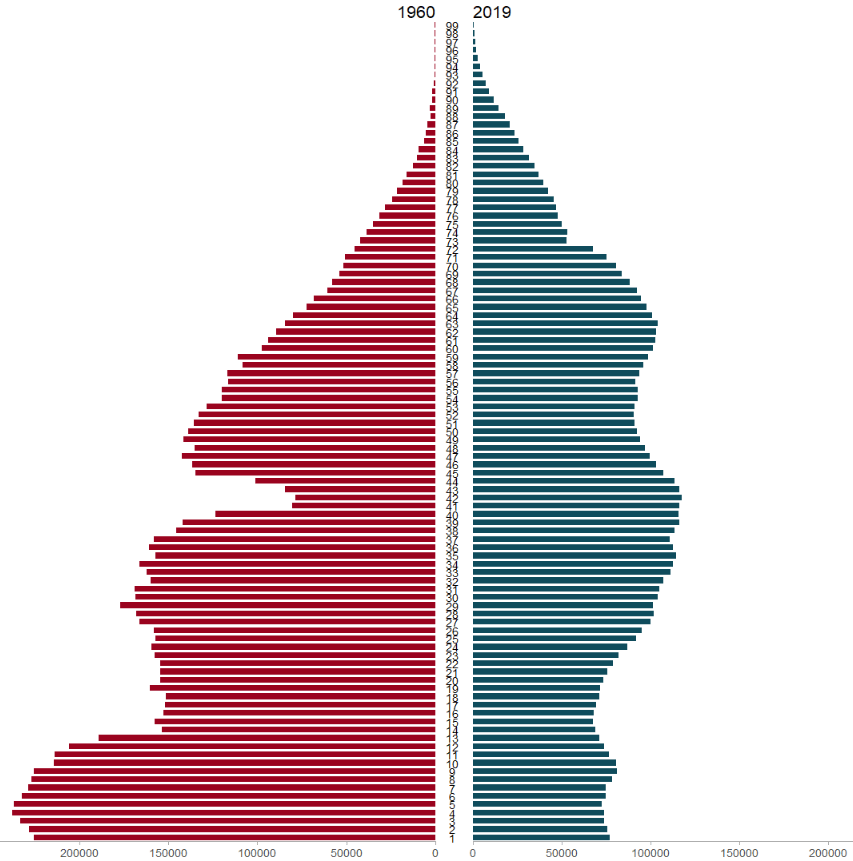
3. eurostat
eurostat provides access to a wide range of statistics and data on the European Union and its member states, covering topics such as population, economics, society, and the environment.
Examples of variables include employment, inflation, education, crime, and air pollution. The package was authored by Leo Lahti.
Reference: eurostat (2018). eurostat: Eurostat Open Data (R Package Version 3.6.0), CRAN PDF retrieved at https://cran.r-project.org/web/packages/eurostat/eurostat.pdf
4. vdemdata
The Varieties of Democracy package by Staffan I. Lindberg et al. provides data on a range of indicators related to democracy and governance in countries around the world, including measures of electoral democracy, civil liberties, and human rights.
Click here to read more about downloading the package
Examples of variables include freedom of speech, rule of law, corruption, government transparency, and voter turnout.
Reference: Lindberg, S. I., & Stepanova, N. (2020). vdem: Varieties of Democracy Project (R Package Version 1.6).
5. democracyData
This package by Xavier Marquez: provides data on a range of variables related to democracy, including elections, political parties, and civil liberties.
Examples of variables include regime type, democracy scores (Freedom House, PolityIV etc, Geddes, Wright, and Frantz’ autocratic regimes dataset, the Lexical Index of Electoral Democracy, the DD/ACLP/PACL/CGV dataset), axxording to the Github page
6. icpsrdata
This package by Frederick Solt provides a simple way to download and import data from the Inter-university Consortium for Political and Social Research (ICPSR) archive into R. This is for easy replication and sharing of data. The package includes datasets from different fields of study, including sociology, political science, and economics.
Reference: Solt, F. (2020). icpsrdata: Reproducible Data Retrieval from the ICPSR Archive (R Package Version 0.5.0).
7. Quandl
This R package by Quandl provides an interface to access financial and economic data from over 20 different sources. Examples of variables include stock prices, futures, options, and macroeconomic indicators. The package includes functions to easily download data directly into R and perform tasks such as plotting, transforming, and aggregating data. Additional functions for managing and exploring data, such as search tools and data caching features, are also available.
Here are five examples of variables in the Quandl package:
- “AAPL” (Apple Inc. stock price)
- “CHRIS/CME_CL1” (Crude Oil Futures)
- “FRED/GDP” (US GDP)
- “BCHAIN/MKPRU” (Bitcoin Market Price)
- “USTREASURY/YIELD” (US Treasury Yield Curve Rates)
Reference: Quandl. (2021). Quandl: A library of economic and financial data. Retrieved from https://www.quandl.com/tools/r.
8. essurvey
The essurvey package is an R package that provides access to data from the European Social Survey (ESS), which is a large-scale survey that collects data on attitudes, values, and behavior across Europe. The package includes functions to easily download, read, and analyze data from the ESS, and also includes documentation and sample code to help users get started.
Examples of variables in the ESS dataset include political interest, trust in political institutions, social class, education level, and income. The package was authored by David Winter and includes a variety of useful functions for working with ESS data.
Reference: Winter, D. (2021). essurvey: Download Data from the European Social Survey on the Fly. R package version 3.4.4. Retrieved from https://cran.r-project.org/package=essurvey.
9. manifestoR
manifestoR is an R package that provides access to data from the Comparative Manifesto Project (CMP), which is a cross-national research project that analyzes political party manifestos. The package allows users to easily download and analyze data from the CMP, including party positions on various policy issues and the salience of those issues across time and space.
Examples of variables in the CMP dataset include party positions on taxation, immigration, the environment, healthcare, and education. The package was authored by Jörg Matthes, Marcelo Jenny, and Carsten Schwemmer.
Reference: Matthes, J., Jenny, M., & Schwemmer, C. (2018). manifestoR: Access and Process Data and Documents of the Manifesto Project. R package version 1.2.1. Retrieved from https://cran.r-project.org/package=manifestoR.
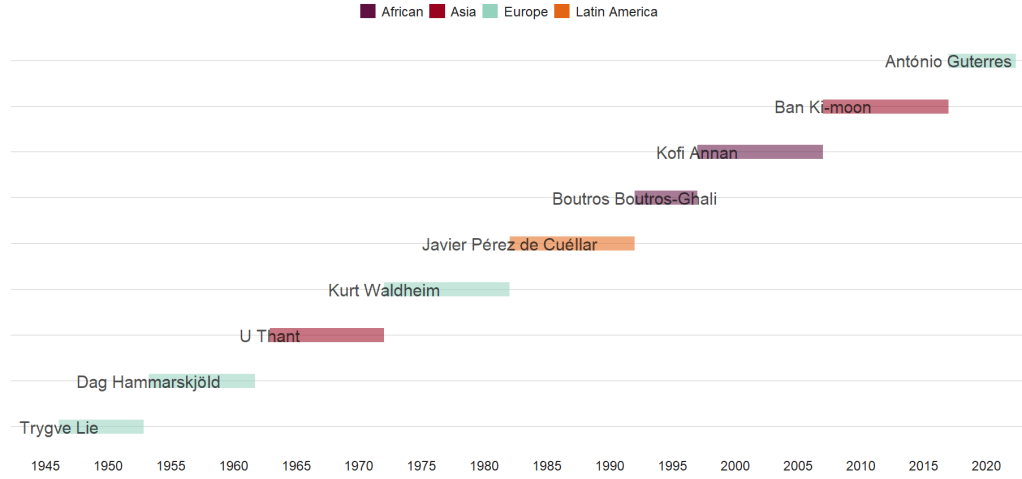
10. unvotes
The unvotes data package provides historical voting data of the United Nations General Assembly, including votes for each country in each roll call, as well as descriptions and topic classifications for each vote.
The classifications included in the dataset cover a wide range of issues, including human rights, disarmament, decolonization, and Middle East-related issues.
Reference: The package was created by David Robinson and Nicholas Goguen-Compagnoni and is available on the Comprehensive R Archive Network (CRAN) at https://cran.r-project.org/web/packages/unvotes/unvotes.pdf.
11. gravity
The gravity package in R, created by Anna-Lena Woelwer, provides a set of functions for estimating gravity models, which are used to analyze bilateral trade flows between countries. The package includes the gravity_data dataset, which contains information on trade flows between pairs of countries.
Examples of variables that may affect trade in the dataset are GDP, distance, and the presence of regional trade agreements, contiguity, common official language, and common currency.
iso_o: ISO-Code of country of origin
iso_d: ISO-Code of country of destination
distw: weighted distance
gdp_o: GDP of country of origin
gdp_d: GDP of country of destination
rta: regional trade agreement
flow: trade flow
contig: contiguity
comlang_off: common official language
comcur: common currency
The package PDF CRAN is available at http://cran.nexr.com/web/packages/gravity/gravity.pdf